Mixer
The mixer is used for controlling and adjusting the output parameters of your tracks to achieve the best mix for your project.

Each channel represents one track of your project. Its name is displayed at the bottom.
Use the two finger pinch gesture or the S, M or XL buttons (available on tablets only) to change the width of the channel strips in the mixer.
On tablets, you can hold and drag the upper bar up or down to change the overall height of the mixer.
Channels
Each channel holds the following controls:
 Pan fader: Slide horizontally to adjust your track's stereo pan.
 Volume fader:
Slide the volume fader vertically to set the track's gain. The volume levels during playback or recording are visually shown on its right hand indicator. The display at the bottom of the channel shows the fader's value in
decibels (negative values mean a decrease in volume).
Note: The pan and volume faders' value can be reset by double tapping them.
Volume fader:
Slide the volume fader vertically to set the track's gain. The volume levels during playback or recording are visually shown on its right hand indicator. The display at the bottom of the channel shows the fader's value in
decibels (negative values mean a decrease in volume).
Note: The pan and volume faders' value can be reset by double tapping them.-
 Mute: Use this button to toggle whether the channel's track is muted and therefore excluded from playback.
  Solo: Soloing a track (or a group of tracks) excludes all the other tracks from playback.
 Read: When enabled, all automation data on this track is read and applied during playback.
 Write: Activate this button to record automation data live during playback / recording. More information on automation can be found here.
  Effects: Use this button to add effects to your track. This article explains how.
  Monitoring (audio tracks only): Monitoring outputs the audio input of your track routed through the track's effects.
Note: In order to prevent feedback, monitoring only works if hardware (e.g. headphones, a microphone or an audio interface) is connected.
Monitoring (audio tracks only): Monitoring outputs the audio input of your track routed through the track's effects.
Note: In order to prevent feedback, monitoring only works if hardware (e.g. headphones, a microphone or an audio interface) is connected. Setting a track to Record Enable lets Cubasis know that you wish to record on this track. You can have multiple tracks Record Enabled at a time, which allows for recording on multiple tracks simultaneously.
 Output Routing
![]()
![]() MIDI and audio tracks can be assigned to up to 24 individual outputs (12 stereo pairs) simultaneously. The number of available outputs depends on capability of the connected audio hardware. If no audio interface is connected, only 2 output channels (stereo pair 1/2) are available.
MIDI and audio tracks can be assigned to up to 24 individual outputs (12 stereo pairs) simultaneously. The number of available outputs depends on capability of the connected audio hardware. If no audio interface is connected, only 2 output channels (stereo pair 1/2) are available.
To assign specific outputs, tap the Output display (showing 1/2 by default) and toggle stereo outputs via the buttons in the output popup. This popup window can also be called up by tapping the output panel in the inspector's routing section.
Note:- If multiple outputs are assigned to a single track, the output panel will display a plus sign, for example "1/2+".
- Only the primary master channel (= the Stereo Output 1/2) has insert effects.
- The send effects only route to the primary Stereo Output 1/2 channel.
Master channel
The last channel to the right of your screen (labelled 1/2 Stereo Out) represents all of your project's channels combined and routes to the first stereo output pair (channels 1 and 2). Consequently, it cannot be soloed or recorded on. You can add up to eight master insert effects, that are applied to the whole mix.
For more information, see the Effects chapter.
Note: By default, a post-fader Brickwall Limiter is assined in order to reduce occasional peaks in the signal.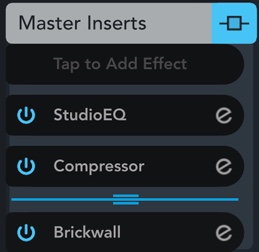
 Metronome output
The metronome button is only available on the master channel and additional output channels. This option allows you to select the output destination(s) of the metronome. For instance, to output the metronome only on channel 5, select output 5 & 6 and either pan the metronome to the left (in the setup menu), or pan the output bus 5 & 6 to the left.