Effects
Effect routing
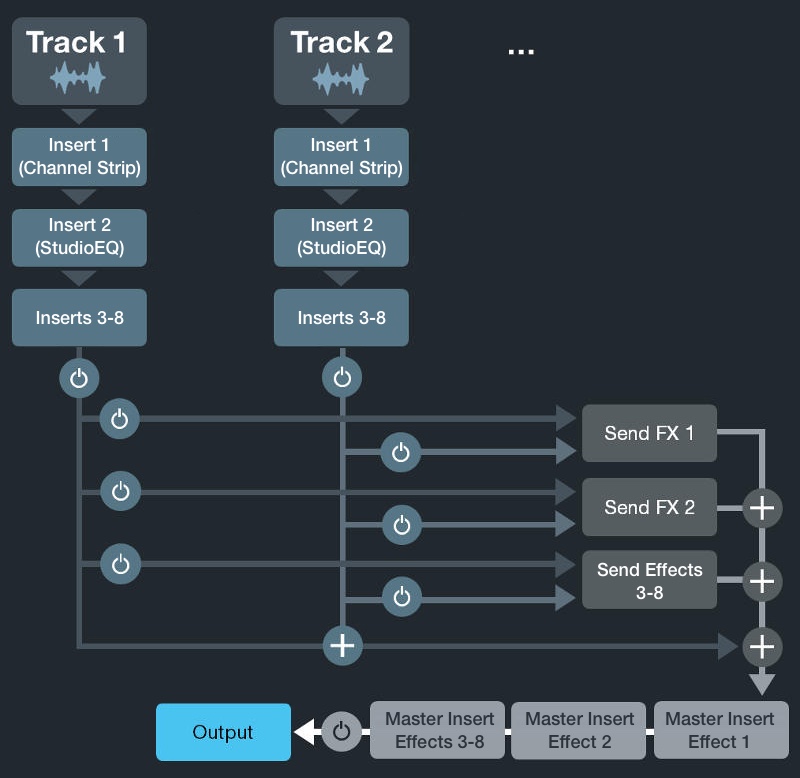
The above diagram illustrates the audio routing of Cubasis.
Insert effects
The insert effects section allows to add up to eight different insert effects independently for each audio or MIDI track. By default, a StudioEQ equalizer with 4 bands for each channel is assigned to each track as well as the multifunctional Channel Strip effect suite.
You can change the position of insert and send effects by moving them to a different slot. To do so, tap and hold the effect to be rearranged and drag it to another slot.
The “e” icon of effect that is currently opened is colored blue. Note that selecting a track does not change the opened effect, so it’s possible to open an effect of track 1 and then select track 2 in the track list. In the Inspector of track 2, all effects will have a gray “e” icon, indicating that they are not opened.
An effect section's color indicates the current status of its effects:
- Light blue when effects are active
- Dark gray when effects are present but inactive
- Light gray when no effects are present

Send effects
There are 8 global send buses that all tracks have access to. The level in which send effects are applied to the mix can be adjusted for each track.
What is the difference between inserts and sends?
An insert effect only affects one track. A send effect applies to all tracks, but you can adjust the send level for each track individually.
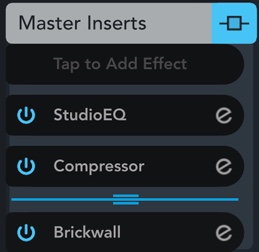
Master insert effects
Similar to the insert effects section, the master inserts section allows to add up to eight different insert effects for the stereo out channel strip. Below the assignable insert effects a built-in post-fader Brickwall Limiter is available in order to reduce occasional peaks in the signal.
To add master inserts, use the mixer. 
Tap the  button on the Stereo Out channel and apply steps 4 and 5 in the list below.