
Beneath its streamlined interface, SpectraLayers One provides you with powerful tools for spectral editing.
This topic will help you find your way around the application so you can unlock its full potential.
- When you first start SpectraLayers One, the tools are unavailable until you open a file or create a project.
-
We’ll create a project by opening an existing audio file.
Click › to open an audio file. It will become the first layer of your project.
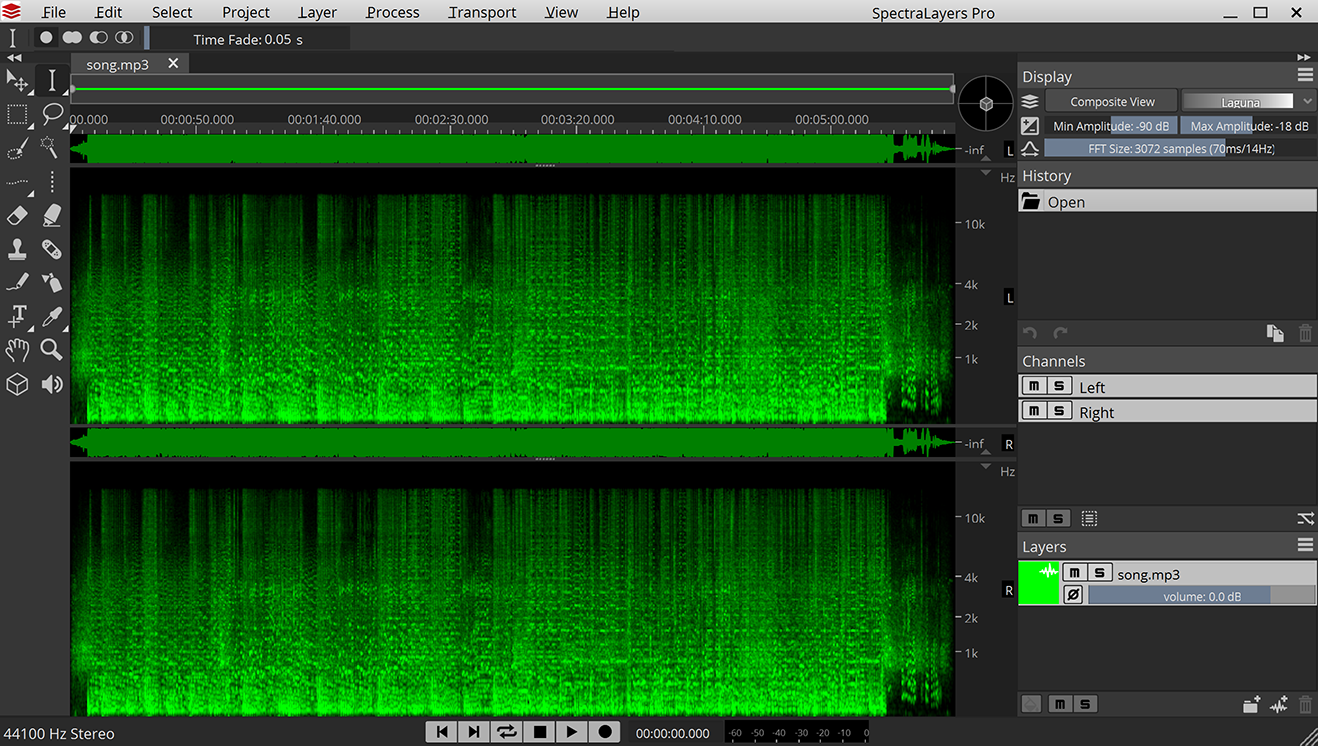
After you open the file, you’ll see it displayed and highlighted in the Layers panel in the bottom-right corner of the workspace. The tools are now available on the left side of the workspace. In the center of the screen is the spectral display.
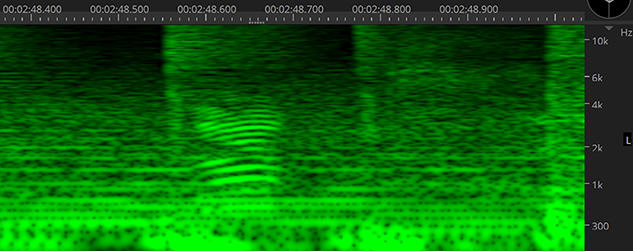
In the spectral display, the horizontal axis represents time, and the vertical axis represents frequency. The spots you can see correspond to a mix of the various frequencies and noise that compose your audio file. The higher the spots, the higher the pitch of sounds in your audio file.
You can play your audio file by clicking the
 Play button at the bottom or pressing Space.
- Before performing any edits, you need to select a layer.
Click the layer in the Layers panel to select it if it isn’t already selected. A selected layer is highlighted in the Layers panel. -
The first step in most editing is selecting data in the spectrogram. Let’s create some selections.
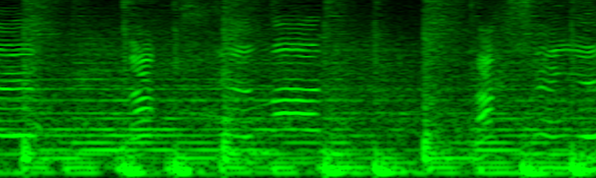
Take a closer look at some frequencies. If your file contains vocals or musical instruments, you’ll see horizontal lines that represent syllables or musical notes. Several of these lines on top of each other represent harmonics, and they create the audio signature of each voice and instrument.
-
Zoom the spectral display to find the parts of a spectrogram that you want to edit.
Use the
 Zoom tool at the bottom of the tools bar on the left to change the magnification of the spectral display.
You can navigate the spectral display using the
 Hand tool next to the Zoom tool. Drag with the Hand tool to move the spectrogram within the spectral display.
When you zoom in horizontally or vertically, you may notice that the frequencies will appear blurry:
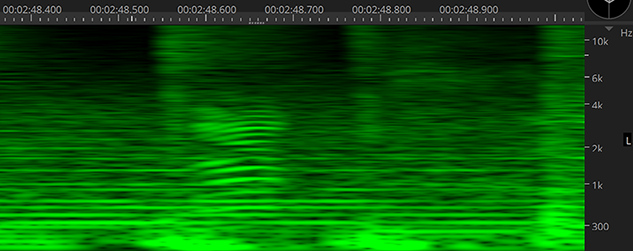
The FFT Size parameter in the Display Panel (top right) allows you to refine the spectral display. You can choose a different resolution by dragging the slider or typing a value in the edit box.
After increasing the frequency resolution, you can see that the frequency lines are thinner.
Experiment with different FFT sizes to find the setting that allows you to see each line clearly.
-
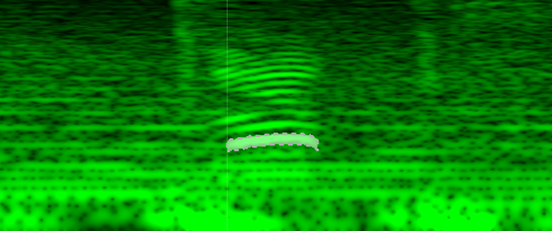
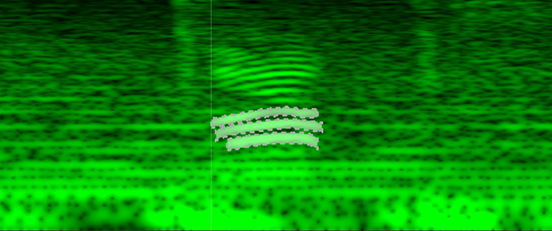
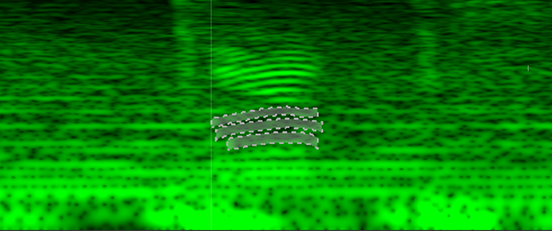
Let’s select some frequencies so we can cut them and paste them to a new layer.
Click the
 Rectangular Selection tool in the Tools toolbar.
+
With the ![]() Add to Selection button in the Tool Settings toolbar selected (or by holding down the Shift key), click a few frequencies on top of each others, and see how they are also highlighted.
It means they have been added to the selection. Notice the Play button (or Space) now plays the current selection.
Add to Selection button in the Tool Settings toolbar selected (or by holding down the Shift key), click a few frequencies on top of each others, and see how they are also highlighted.
It means they have been added to the selection. Notice the Play button (or Space) now plays the current selection.
-
Let’s cut the selected frequencies to a new layer.
- Choose › or press Ctrl+X (Windows) Cmd+X (macOS).
Notice that the frequencies you selected in the previous step are removed from the spectral display.
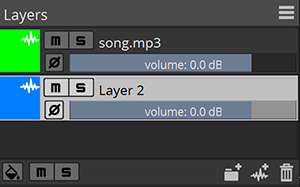
- Click the
 New Layer button at the bottom of the Layers Panel (or choose › ) to create a new layer. Notice the new layer is highlighted, meaning it’s now the active layer.
-
Choose › or press Ctrl+V (Windows) Cmd+V (macOS). Notice the spectral color of that layer match its color setting in the Layers panel.

![[Tip]](skin/admon/tip.png)
Tip These 3 steps can be replaced by a single action using › › (Shift+X)
- Choose › or press Ctrl+X (Windows) Cmd+X (macOS).
- Click the
 Mute button on the new layer or drag its volume fader to the left to reduce its volume.
Notice the content fades away from the spectrogram as well.
If you play your project, the frequencies you pasted to the new layer will be removed or attenuated.
Mute button on the new layer or drag its volume fader to the left to reduce its volume.
Notice the content fades away from the spectrogram as well.
If you play your project, the frequencies you pasted to the new layer will be removed or attenuated.
![[Note]](skin/admon/note.png) |
Note |
|---|---|
|
Creating multiple layers and experimenting with different tools will give you a lot of flexibility to extract, restore or design the exact sound you need. You can also adjust the display settings such as the FFT Size while using a tool if needed. |
